How I made this: Personal Dashboard with Raspberry Pi
19/02/2025
This project is actually something I did way back in 2020 as part of my initial dive into computers. Five years later, my family still uses it on a daily basis to figure out what will happen today.
This article is NOT a tutorial on how to setup this dashboard. If you want that, this article covers everything better detail than I could.
This will however cover some weird behaviour and quirks I had to overcome while setting my dashboard up. I'd suggest following this article shortly after reading the one I linked.
About the Dashboard
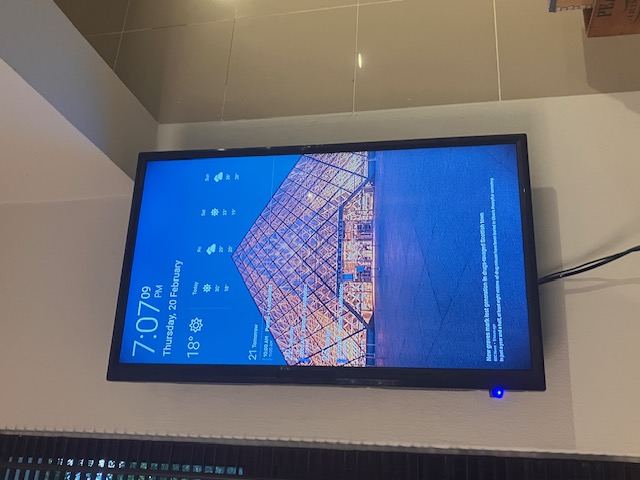
Nothing really special about it tbh. It's a Raspberry Pi 3B+ running FullpageOS that displays a webpage on DAKboard.
Automatic Shutoff
While DAKboard does provide some scripts to blank and unblank the display using HDMI CEC. In my experience when I first tried to set it up in 2020, they didn't work. When I revisited the project I realised that using xset to control DPMS (Display Power Management Signalling)
worked as an alternative.
startup.sh
1
2
3
4
5
6
#!/bin/bash
# run when board wakes up from sleep
sleep 1 # recommended to pause a bit before using xset
DISPLAY=:0 xset -dpms # send video signal to display
/home/pi/scripts/relay.sh # trigger relay to turn on TV (needed for mine maybe not for yours)
/home/pi/scripts/reload_fullpage_os_txt # sometimes my display will be stuck on a blank screen this fixes it
I basically did the opposite to put the display to sleep.
shutdown.sh
1
2
3
4
5
#!/bin/bash
# run when board goes to sleep
sleep 1 # recommended to pause a bit before using xset
DISPLAY=:0 xset dpms force off # use dpms to blank screen
/home/pi/scripts/relay.sh  # trigger relay to turn off TV (needed for mine maybe not for yours)
Cron Jobs
Cron is a popular method of running commands at arbitrary times on a Linux system. They're used extensively in this project.
User level Cron jobs accessed via crontab -e

The @reboot job just runs a boot script (with nothing in it at the moment). We shut the TV off at 9PM and turn it back on at 5AM. Every hour from 5AM to 8PM, we'll reload the display hourly to fix screen blanking issues.
Root level Cron jobs accessed via sudo crontab -e

This is just a basic wifi reconnect script that runs every minute. It's probably redundant but with a system where uptime is the top priority, redundancy is desired.
Blank Screen on Startup
Due to the dogwater WiFi in my house (thanks unifi <3), occasionally I would find that my display would not launch the Chromium browser after boot. Looking online I theorised that the issue was that sometimes the dashboard failed to connect to WiFi at boot and since the startup script looked exclusively for a successful (HTTP 200) connection, the system would be stuck waiting for an internet connection.

To get around this in my case, I simply ran sudo raspi-config enabled "Network at Boot" under the "System Options".
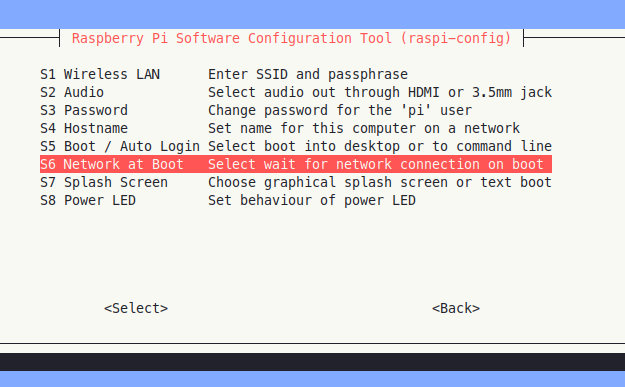
Ever since my dashboard has not had this problem since. Hopefully it could work for you.
Weird Blanking Issues
This was a tough problem since no one really knew what was happening. Since reliability is the top priority for the board (doubly so considering I won't be in the country to fix problems if they arise), a dirty but reliable fix was my preferred solution.
Basically I noticed that running the reload_fullpageos_txt script would always solve the problem. I scheduled a Cron job to run this script every hour. This would mean if the screen suddenly blanks, it will be 100% resolved in under an hour.
To prevent the screen refreshing (and therefore turning back on) at night, I set the Cron job to only operate between 5AM and 8PM.
Hardware Control
If your TV is like mine, while your TV does have a standby period after signal is lost, eventually it will go to sleep on its own and not react to new input until the TV is physically turned on.
This meant that even if I used xset to blank the display, after 1 hour the TV will turn itself off meaning my software won't be able to unblank it.
In order to solve this I had to use a hardware solution in the form of 3.3V relay module.
The 3.3V is important. Despite being able to output 5v on their GPIO pins, these pins use 3.3V logic and are not 5V tolerant.
When looking for a relay online, you'll need to specifically look for 3.3V ones.
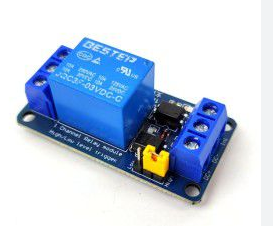
The one I used
We need this relay to emulate presses of the power button. This meant that I had to partially disassemble the TV in order to get access to the power button and solder wires to the contacts. By shorting these wires, I could simulate pressing of the power button.
While this may sound daunting, honestly it was really easy to open up the TV as it was only ~12 screws. I used a multimeter set to continuity mode to figure out where I needed to solder the wires.
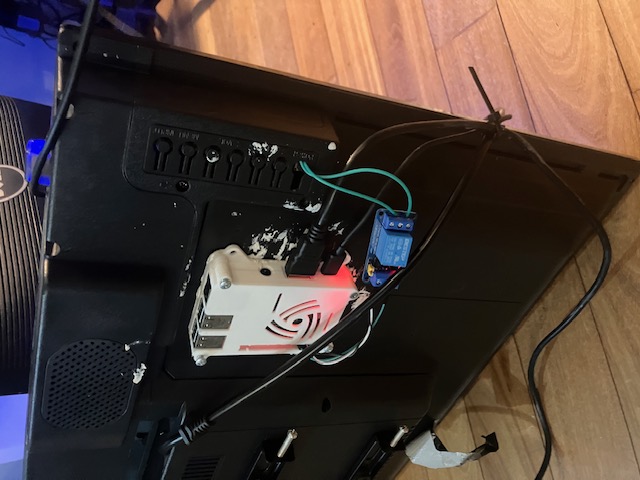
pls ignore the messy sticky tack. Notice the green wires that lead into the TV
After soldering my wires, I attached them to the COM (common) and NO (normally open) screw terminals of the relay. I attached jumper wires to the 3.3V, ground and PIN 14 GPIO pins on the Pi. After that we could control them very easily using this script.
relay.sh
1
2
3
4
5
6
#!/bin/bash
# emulates a press of the power button
raspi-gpio set 14 op
raspi-gpio set 14 dh
sleep 1
raspi-gpio set 14 dl
Conclusion
I am just writing about my experience setting up this dashboard for use by my family. There were a few problems that left me scratching my head and hopefully if you are setting a similar system up for yourself. You can take some inspiration from what I've done and perhaps solve some of the issues yourself.